

How to Rig Chafe Tubing for Tuna Leaders (2026 Guide)
Table of Contents
- Why Chafe Tubing Belongs on Every Tuna Rig
- Chafe Tubing for Fishing Leaders: Material and Size Guide
- How to Crimp a Tuna Leader: Step-by-Step
- Tuna Rig Chafe Tube Length: How Long Should It Be?
- Heavy-Duty Monofilament Leader Setup for Tuna
- Common Mistakes and Troubleshooting Chafe Tubing
- Frequently Asked Questions
Last Updated: October 12, 2026
Why Chafe Tubing Belongs on Every Tuna Rig
To rig chafe tubing for tuna: slide a length of protective sleeve over your leader, position it at the hook or swivel connection, and crimp it in place so the tubing sits between your line and anything that rubs. That step is the difference between a leader that survives a long fight and one that fails at the worst moment.
Here at Titan Guard Chafe Tubing, we build heavy-duty sleeving for exactly this job, guarding monofilament leaders against abrasion and sharp fish teeth.
Tuna engulf a bait and run, dragging your leader across their jaws, gill plates, and the boat's rail. Every one of those surfaces cuts.
What Chafe Tubing Protects Against
Chafe tubing is a protective sleeve that slides over a fishing leader to shield it from abrasion, friction, and sharp teeth at connection points. It is not a replacement for a strong leader. It is armor for the spots that fail first.
The main threats to a tuna leader:
- Sharp teeth contacting the line at the hook
- Jaw and gill plate friction during a long run
- Rail and rub rail wear as the fish circles the boat
- Glare and UV exposure degrading clear line over time
- Crimp and terminal connection stress where line meets hardware
Most leaders break at a connection, not in open water. That is where chafe gear earns its place.
Chafe Tubing for Fishing Leaders: Material and Size Guide
For chafe tubing for fishing leaders, the two decisions that matter are material and size. Match the material to your conditions and the inner diameter to your leader, crimp, and hardware, get both wrong and the tube slides off, won't fit over the crimp, or binds the swivel eye.
Plastic vs. Teflon and Clear vs. Black Tubing
Plastic tubing is the workhorse: affordable, sold on bulk rolls, and fine for most offshore rigging. Teflon tubing slides more freely and resists friction heat better on repeated runs. Metal spring-style chafe gear (coiled stainless or brass) resists teeth and jaw abrasion better than plastic, but is heavier, can kink, and is harder to seat over a crimp.
Color matters more than most anglers think:
| Tubing Type | Best For | Trade-Off |
|---|---|---|
| Clear plastic | Finesse presentations, wary fish | Less UV resistance |
| Black plastic | Bright sun, surface trolling | Slightly stiffer |
| Clear Teflon | Wind-on leaders, splice protection | Costs more |
| Black Teflon | Heavy tackle, long fights | Premium price |
| Metal spring | Tooth-heavy bites, heavy leader | Heavier, can kink |
Black tubing cuts glare when tuna are pressured; clear keeps your rig looking natural. Teflon's lower friction helps when a leader runs through a rod tip or roller guide.
Sizing Chart: Match Tubing ID to Leader, Crimp, and Hardware
Sizing is where rigs fail. The tubing has to clear three things at once: the leader, the crimp sleeve, and the eye of the hook or swivel. If it clears the leader but not the crimp, it won't slide into position; if it clears the crimp but not the eye, it binds at the hardware. Use this as a starting point and dry-fit before you crimp:
| Leader (lb test) | Typical Leader Diameter | Crimp Sleeve Size | Tubing ID to Try |
|---|---|---|---|
| 80 lb mono | ~0.035 in | Small (matches 0.035-0.041 in) | ~0.045-0.050 in |
| 100 lb mono | ~0.041 in | Small-medium | ~0.050-0.055 in |
| 130 lb mono | ~0.046 in | Medium | ~0.055-0.062 in |
| 200 lb mono | ~0.058 in | Medium-large | ~0.068-0.075 in |
| 300 lb mono | ~0.072 in | Large | ~0.082-0.090 in |
| 400 lb mono | ~0.083 in | Large-extra large | ~0.095-0.105 in |
Diameter figures vary by manufacturer and leader material. Always measure your actual leader with calipers or match it against the crimp manufacturer's size chart before ordering tubing.
Rules of thumb that hold across brands:
- The tube should slide over the leader with light resistance. If it drops on with no drag, it is too loose and will migrate.
- It must still slide over the crimp sleeve. Test before you crimp, once compressed, the sleeve won't pass through a tube that was tight to begin with.
- It must clear the hook eye or swivel eye. If the tube binds at the eye, the leader can't pivot freely and the connection takes side-load it wasn't designed for.
- Step up one size when in doubt. A slightly loose tube that stays put beats a tight tube you can't install on a rocking deck.
:::pro tip Cut your tubing a touch long, then trim after crimping. It is far easier to shorten a tube than to wish you had more coverage at the hook.
How to Crimp a Tuna Leader: Step-by-Step
Learning how to crimp a tuna leader correctly is the backbone of any tuna rig.
What you'll need:
- Heavy monofilament leader material
- Crimp sleeves sized to your leader
- A hand crimper matched to the sleeve
- Chafe tubing cut to length
- Hook, swivel, or snap swivel
- Calipers or a crimp-maker's size chart
Step 1: Cut the leader to length. [Time: 2 minutes] Measure your target length and add extra for the connections.
Step 4: Form the loop and seat the sleeve. [Time: 1 minute] Bring the tag end back through the sleeve to form your loop.
Step 7: Inspect and test. [Time: 1 minute] Tug the connection firmly. Look for any slippage or damage before it hits the water.
How to Inspect a Finished Connection
A crimp that looks fine on deck can fail on the first run. Check these five things:
- Slippage: Mark the leader at the sleeve edge before crimping. If the mark moves afterward, the sleeve didn't bite and the connection must be redone.
- Pinching: A properly crimped sleeve is compressed evenly; a pinched or flattened one has crushed the leader and created a weak point.
- Sharp edges: Run a fingertip along the sleeve and the cut end of the tubing, any burr will abrade the leader under load.
- Exposed leader at the crimp: Bare leader between sleeve and tubing means the tube is too short or seated wrong.
- Tubing migration: Push the tube toward the hook. If it slides freely, the inner diameter is too large and it will move during the fight.
How the Sequence Changes by Rig Type
The order stays the same, but where the tubing sits shifts:
- Hook end (single hook): Tubing covers the crimp and extends up the leader toward the rod, the side that drags across jaws and gill plates.
- Swivel end: Tubing covers the crimp and the short section of leader entering the swivel eye, protecting where it pivots under load.
- Stinger rigs: Add a short section of tubing where the stinger leader rides near the bait, which takes abrasion from bait and teeth at once.
- Snap swivels: Tubing should stop short of the snap gate so it opens and closes freely, a tube over the gate will jam it.
- Wind-on leaders: Tubing protects the splice where leader meets main line. Use a thinner-wall tube so the splice passes through the rod guides.
Expected result: A crimped, protected connection with the tubing seated over the sleeve and a few inches of leader, no exposed leader at the crimp, and a clean tug test.
Tuna Rig Chafe Tube Length: How Long Should It Be?
The right tuna rig chafe tube length covers the crimp and extends a few inches up the leader. Short tubes protect only the knot; long tubes add drag and can foul the hook. For most tuna rigs, covering the terminal connection plus a few inches of leader above it protects where the fish contacts the line without creating a bulky rig.
Length guidance by connection:
- Hook connection: cover the crimp and a few inches of leader
- Swivel connection: cover the crimp and the leader entering the swivel
- Stinger rigs: protect the section that rides near the bait
- Wind-on leaders: protect the splice where the leader meets the main line
Cut to length on the boat, not at home, a tube that fits one rig may be wrong for the next.
Heavy-Duty Monofilament Leader Setup for Tuna
A heavy-duty monofilament leader setup for tuna starts with strong line, matched hardware, and chafe protection at every terminal connection.
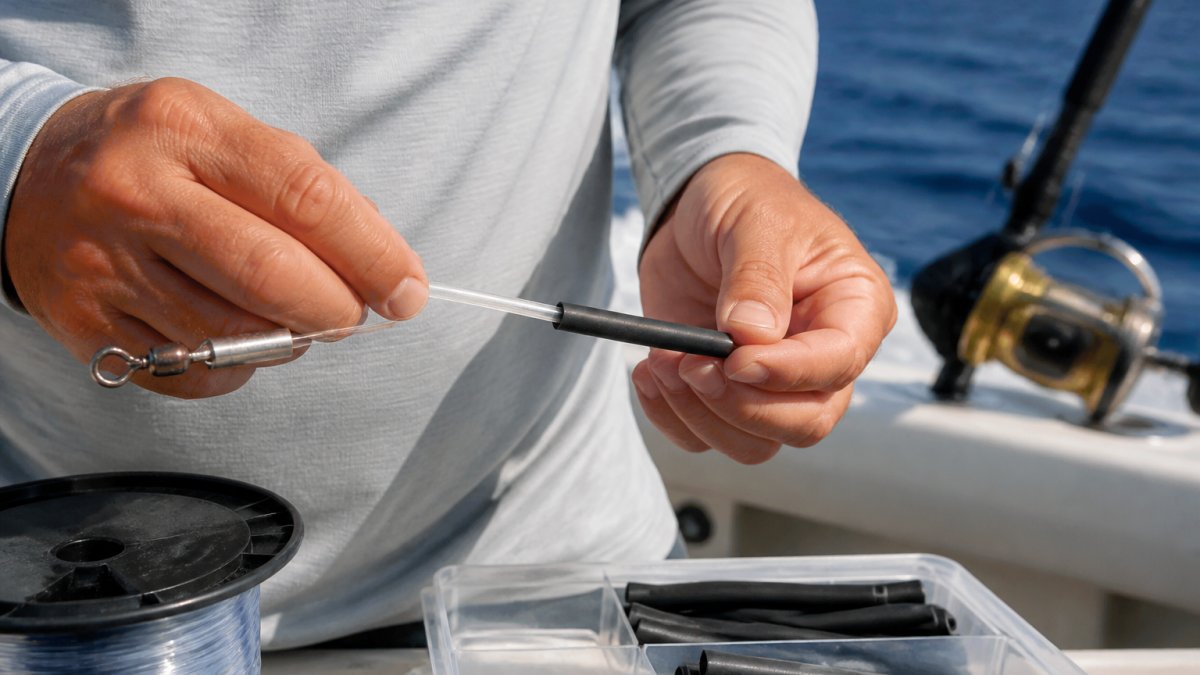
Here is how we would build a tuna rig from scratch:
- Choose leader material rated for your target fish. Many anglers run 130-pound leader for school tuna and step up to 300-pound leader for bigger fish.
- Match your crimp sleeves and hand crimper to the leader diameter.
- Add chafe tubing at the hook and swivel connections.
- Use a snap swivel where you need to change baits fast.
- Inspect every crimp before the bait hits the water.
For offshore rigging, connection points take the most abuse, protect them first. This is where our tubing does its job.
Common Mistakes and Troubleshooting Chafe Tubing
Most chafe tubing problems come down to three things: wrong size, wrong position, or worn tubing that should have been replaced. When a rig fails, the tubing is often the first place to look.
| Problem | Likely Cause | Fix |
|---|---|---|
| Tubing slides out of place | Inner diameter too large | Step down a size |
| Tubing won't fit over crimp | Inner diameter too small | Step up a size |
| Leader wears under tubing | Tube too short | Cut a longer piece |
| Hook fouls on the tube | Tube too long | Trim it back |
| Crimp slips | Weak or wrong crimp | Re-crimp with a matched hand crimper |
A few habits separate anglers who land fish from those who lose them:
- Replace the stinger and tubing after a hard fight
- Check tubing for cracks or wear before every trip
- Keep a bulk roll on the boat to re-rig fast
- Never reuse a crimp sleeve
The tubing is cheap insurance. A lost fish is not.
Frequently Asked Questions
What is the best rig setup for catching tuna?
A standard tuna rig uses a heavy monofilament leader (often 130- to 300-pound test) with a crimped loop at the hook and a swivel at the top. Chafe tubing slides over the leader at both connections to prevent abrasion from teeth and gill plates. For offshore trolling, match the leader strength to your target class and always inspect crimps before each trip. This setup handles the extreme pressure of big tuna and reduces the chance of cut-offs.
How long should chafe tubing be for a tuna leader?
The key is to protect the terminal tackle without adding excessive bulk that could affect lure action or bait presentation.
Can chafe tubing protect a leader from tuna teeth?
Yes. Tuna have sharp, abrasive teeth that can quickly wear through monofilament. Chafe tubing acts as a sacrificial barrier, taking the friction and wear instead of the leader. It is especially effective when the fish is close to the boat and thrashing. While no tubing is indestructible, heavy-duty options like Titan Guard Chafe Tubing are designed to withstand repeated contact and extend leader life.
How do I know what size chafe tubing to use for my leader?
Match the tubing's inner diameter to your leader's diameter. The tubing should slide on with slight resistance but not require forcing. Always test-fit a short piece before cutting your final lengths. If it slides on too easily, it may not stay in place during a fight.
Tuna fishing punishes weak connections, and the leader is where most heartbreak happens. Titan Guard Chafe Tubing gives you heavy-duty sleeving that protects monofilament leaders from abrasion and sharp teeth, so your rig holds when it counts. Our tubing is 100% made in the USA in a family-owned factory, ships fast, and comes with hassle-free returns. Get started with Titan Guard Chafe Tubing and rig every leader with confidence.