

7 Gear Failures That Cost You Big Game Fish
Last Updated: October 30, 2026
Quick Summary
Preventing gear failure starts with a repeatable pre-trip inspection: run every leader through your fingers for roughness, check each knot for a clean seat, and confirm chafe protection is in place. Retire any suspect leader, test every knot before it hits the water, and carry spare leaders and a repair kit on board.
- Run the night-before walkthrough in good light with gear laid out; it takes about twenty minutes.
- A healthy monofilament leader springs back when bent sharply; one that stays kinked is done.
- Lubricate knots before seating them, since dry tightening creates heat and weakens the line.
- Match backups to trip length: day hunts need spare batteries and a spare headlamp.
- Test every repair at home so you can do it with cold hands in the dark.
Table of Contents
- Why Big Game Gear Fails When It Matters Most
- The Big Game Fishing Pre-Trip Checklist That Catches Failures Early
- Monofilament Leader Inspection: Where Most Failures Start
- Fishing Leader Chafe Protection That Survives Teeth and Structure
- Big Game Fishing Knots and Connections: The Weakest Link
- Power, Electronics, and Weather: The Failures Nobody Plans For
- Redundancy and Field Repair Kits: Your Backup Plan
- Stock Your Repair Kit Before Your Next Trip
- Frequently Asked Questions
Why Big Game Gear Fails When It Matters Most
Gear failure is the moment a connection, leader, or system gives way under load, and it almost never happens without warning. At Titan Guard Chafe Tubing, we hear the same story after every lost fish: the gear worked fine for years, right up until it didn't.
Most anglers blame bad luck. The better explanation is usually one of three things:
- Abrasion that thinned a leader without anyone noticing
- A knot that seated wrong and slipped under shock
- A connection that corroded or chafed where two parts meet
All three are catchable before you leave the dock. What follows is a practical system for preventing big game gear failure, built around inspection, protection, and backup.
The Big Game Fishing Pre-Trip Checklist That Catches Failures Early
A big game fishing pre-trip checklist is a short, repeatable inspection routine that finds weak points before a fish does. Run it in two passes: a calm walkthrough the night before, then a fast confirmation at the dock.
The Night-Before Walkthrough
Do this in good light, with your gear laid out. It takes about twenty minutes.
- Unspool the first stretch of every leader and run it through your fingers for roughness
- Check every knot for a clean, even seat with no gaps or crossed turns
- Look at guides for nicks, cracks, or worn inserts
A common mistake is skipping the finger test because the leader "looks fine." Roughness you can feel is damage you cannot always see.
The Dock-Side Check
The dock check is a fast second look, not a repeat of the whole routine. Focus on what changed in transit.
- Re-check knots you tied the night before
- Confirm drag settings match the day's plan
- Make sure chafe protection is seated where it belongs
If something feels off, fix it now. A minute at the dock beats an hour of regret.
Monofilament Leader Inspection: Where Most Failures Start
Monofilament leader inspection is a close check for abrasion, nicks, and stiffness along the leader. The leader is the first thing to fail on most big game setups because it takes the most abuse from teeth, reef, and the boat's own hardware.
Here is where to look and what to do:
- Run the whole leader through your fingers. Feel for rough spots, flat sections, or tiny nicks.
- Hold it to the light. Cloudy or chalky patches signal wear.
- Bend it sharply. A healthy leader springs back. One that stays kinked is done.
- Check the last few feet near the hook. This is where teeth and structure do the most damage.
- Retire anything suspect. Do not gamble on a leader you already doubt.
Monofilament degrades quietly, sun, salt, and heat all take a toll. For the full reasoning behind sleeving and protection, our guide on why use chafe tubing for monofilament walks through it in detail.
Fishing Leader Chafe Protection That Survives Teeth and Structure
Fishing leader chafe protection is a sleeve that sits over the leader where it meets teeth, reef, or hardware, so the abrasion lands on the sleeve instead of the line.
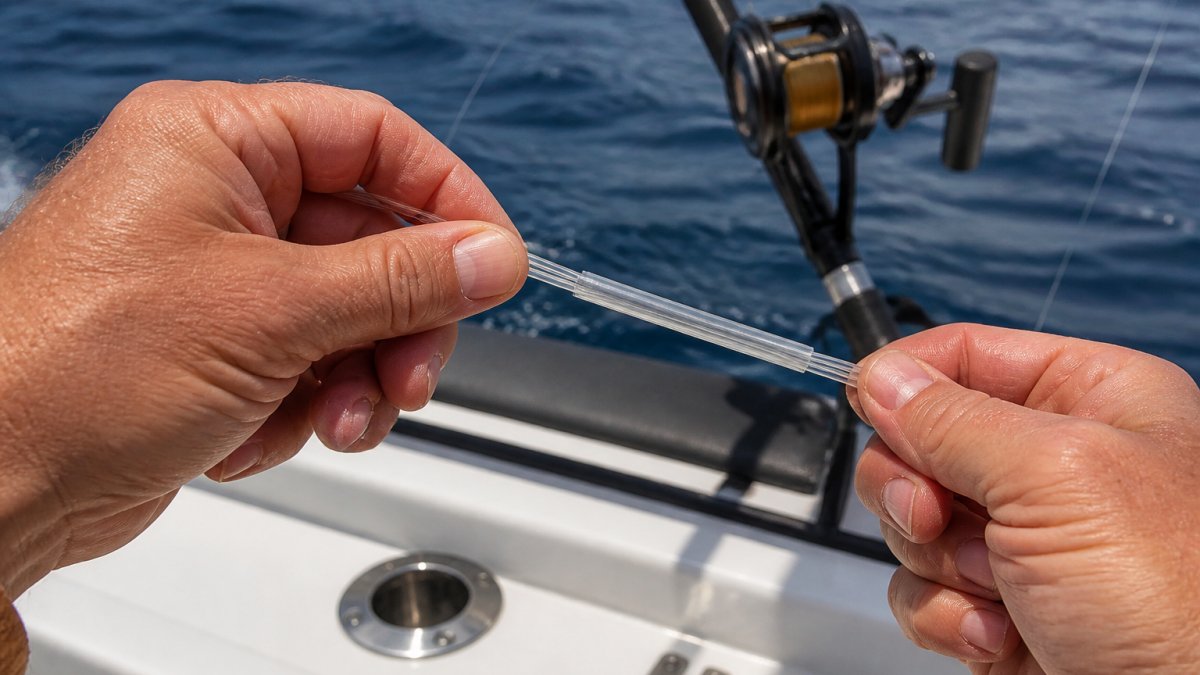
Where protection matters most:
- The last stretch of leader near the hook, where teeth land
- Any point that contacts reef, wreck, or structure
- Spots where the leader meets hardware and rubs under load
Our clear plastic chafe tubing is built for exactly these spots. For a closer look at the options we carry, see our guide to the best chafe tubing for big game fishing. For step-by-step protection methods, read how to protect monofilament leaders from abrasion.
Big Game Fishing Knots and Connections: The Weakest Link
Big game fishing knots and connections are the joints where line meets line, hook, or hardware, and they are the most common failure point on heavy tackle.
Start with the basics:
- Match the knot to the line. Heavy monofilament needs more turns than light line.
- Lubricate before you seat it. Dry tightening creates heat and weakens the line.
- Seat it slowly and evenly. Jerking the knot into place leaves gaps.
Watch out: a knot that looks perfect but seated with crossed turns will fail under load, usually at the worst possible moment.
For a deeper set of connection techniques, our rigging tips for big game fishing cover knots and splices in more detail.
Power, Electronics, and Weather: The Failures Nobody Plans For
Electronics and weather are the quiet killers of a hunt. A dead battery or a soaked connection rarely announces itself until you need it, and by then you are miles from the truck.
Battery Reliability by Device Type
Not all batteries fail the same way. Match your testing to the device:
- GPS and communication devices: Lithium-ion packs lose capacity in cold. Charge to full, then store in an inside pocket until you leave the vehicle. Carry a spare pack in a warm pocket, not a pack pocket.
- Headlamps and flashlights: Alkaline cells leak and corrode when stored long-term. Remove batteries from devices you will not use for months, and check terminals for white or green crust before every trip.
- Two-way radios: Nickel-metal hydride packs develop memory if repeatedly topped off. Run them down fully once a season, then charge to full before the hunt.
Experienced hunters often standardize on one battery size (often AA) across as many devices as possible, then carry a single spare set in a waterproof case. That reduces the number of spare types you need and makes it easier to cannibalize from a less critical device if something fails.
Moisture and Weatherproofing Tests
You cannot waterproof everything, but you can test what you have before the hunt:
- The paper towel test. Place a dry paper towel inside your pack or case, seal it, and submerge the whole thing in a bucket for 30 seconds. If the towel is damp, your seal is compromised.
- The zipper check. Run a finger along every zipper on packs and cases. Grit or missing teeth mean water will get in. Clean and lubricate zippers with a silicone stick, not oil.
- The condensation trap. Electronics sealed in a bag can collect condensation when temperatures swing from warm vehicle to cold field. Add a small silica gel pack to any sealed electronics bag, and replace it each season.
- The connection wiggle. With the device on, gently wiggle every cable and connector. If the screen flickers or the device cuts out, the connection is loose or corroded. Clean terminals with a contact cleaner and a cotton swab.
Weather Changes and Backup Plans
Check the forecast the morning of the hunt, not just the week before. A 20-degree temperature drop or an incoming front changes both animal behavior and gear performance. If rain or snow is likely, double-bag critical electronics and add a paper map and compass to your pack, they weigh almost nothing and work when screens do not.
For a deeper look at protecting leaders and connections from moisture and abrasion, see our guide on how to protect monofilament leaders from abrasion.
Redundancy and Field Repair Kits: Your Backup Plan
A field repair kit is a small, packed set of spare parts and tools that lets you fix a failure on the hunt instead of ending the trip. Redundancy means you never rely on a single leader, knot, or battery. But not all backups are equal, what you carry should match the length and remoteness of your trip.
Prioritizing Backups by Trip Length
- Day hunt (back to vehicle by dark): Spare batteries for your two most critical devices, a spare headlamp, and a small roll of duct tape. You can walk out if something fails, so the goal is to keep hunting until dark.
- Weekend hunt (1-2 nights out): Add a spare leader or two, a spare release aid or firing mechanism part if your weapon has one, and a basic first-aid kit. A failure costs a day, but not the trip.
- Extended hunt (3+ days or remote): Add a full spare set of batteries for every device, a spare sight or optic if possible, a comprehensive repair kit, and a satellite messenger or personal locator beacon. At this distance, self-rescue is not an option, so redundancy must cover the failures you cannot walk away from.
What Can Realistically Be Repaired in the Field
Field repairs work best on mechanical and connection failures. Know your limits:
- Can fix in the field: Chafed leader (cut and re-tie), loose or corroded electrical connection (clean and reseat), torn pack strap (duct tape and a spare buckle), dull knife (sharpening stone), leaky hydration bladder (patch kit).
- Cannot fix in the field: Broken optic lens, cracked firearm stock, failed GPS unit (unless you carry a spare), torn waterproof membrane in boots. For these, your only backup is a spare or a plan to hunt without them.
A common mistake is carrying a repair kit full of tools you do not know how to use. Practice every repair at home before you rely on it in the field. A spare buckle and a length of duct tape are worth more than a multi-tool you have never opened.
Building Your Kit: A Hunting-Specific Checklist
| Failure Mode | Field Fix | Why It Matters |
|---|---|---|
| Chafed or nicked leader | Spare leader material and clear plastic chafe tubing | Swap the weak section fast without retying the whole leader |
| Failing knot | Fresh line and a knot tool | Re-tie without cutting the whole leader |
| Corroded electrical connection | Contact cleaner and spare terminals | Restore a solid connection to GPS or radio |
| Dead battery | Spare batteries and a power bank | Keep electronics running when you need them most |
| Torn pack strap or buckle | Spare buckle and duct tape | Keep your pack functional and weight distributed |
| Dull knife | Sharpening stone | A sharp knife is a safety tool, not a luxury |
| Blistered feet | Moleskin and spare socks | Foot failure ends hunts faster than gear failure |
Pack your kit once, check it before every trip, and restock what you use. The kit only helps if it is on board and you know how to use it.
For a closer look at the chafe tubing that belongs in every big game repair kit, see our guide to the best chafe tubing for big game fishing.
Stock Your Repair Kit Before Your Next Trip
The best time to fix gear failure is before it happens, and the best place to start is your repair kit. A 1.5mm chafe tubing 10 pack gives you ten 6-inch pieces ready to go, and the 25 ft roll of chafe tubing at $17.99 or the 50 ft roll at $29.99 covers a full season of leaders.


Our clear plastic tubing is made in the USA and backed by hassle-free returns. Protecting big game gear failure starts with the small parts you can control.
Frequently Asked Questions
How often should you inspect big game fishing leaders?
Check the leader before every trip and run your fingers along the full length after each fish or structure contact. Replace any section with visible nicks, cloudiness, or roughness. On multi-day charters, inspect and retie after every landed fish. A leader that has rubbed a reef or a fish's jaw should be treated as suspect until you have inspected it under good light, because damage often shows as a slight flat spot rather than an obvious cut.
What causes monofilament leaders to fail?
Most leader failures trace back to abrasion from teeth, gills, or structure, plus heat and UV damage from sun exposure and poor storage. Knots tied with too few turns or pulled tight without lubrication can also fail well below the line's rated strength. Inspect for flat spots, cloudiness, and fraying, and retie connections often. Storing leaders out of direct sun between trips slows the degradation that makes mono brittle over time.
How can you prevent chafe damage on a fishing leader?
Add a protective sleeve over the section that contacts teeth, gills, or structure. Clear chafe tubing slides over monofilament and takes the abrasion instead of the line, which is the cheapest insurance on the boat. Titan Guard's 10-pack of 6-inch pieces costs $5.99 and covers several leaders, while a 25 ft roll at $17.99 handles a full season of rigging. Inspect the tubing after each fish and replace it when it looks worn.
What should be included in a big game fishing gear checklist?
A working checklist covers leader material and chafe tubing, spare hooks and crimps, a backup battery pack, a charged handheld GPS or compass, a basic repair kit with tape and wire, and weather-appropriate synthetic layers. Walk the checklist the night before and again at the dock. The goal is catching a failure on land, where you can fix it, rather than offshore where a snapped leader or dead battery ends the day.
Your next trip will test every connection you own. Get ahead of it with Titan Guard Chafe Tubing: clear, heavy-duty sleeving that guards monofilament against abrasion and sharp teeth, made in our family-owned factory and ready to ship. Shop Titan Guard Chafe Tubing and land your next big fish with confidence.
